
Perfectly Grilled Corn on the Cob: A Quick Guide
Selecting the ideal corn for grilling requires attention to several key factors. The husks should be bright green and tightly wrapped around the cob, with golden, slightly sticky silk at the top. When partially peeled, the kernels should appear plump and densely packed.
Avoid corn with dry or brown husks, as this may indicate age. Gently feeling the kernels through the husk can help ensure even spacing and appropriate size. Choosing uniformly sized ears promotes even cooking on the grill.
A gentle squeeze should reveal firmness, avoiding soft or mushy textures. Corn variety is another crucial consideration. Sweet and tender varieties like Silver Queen or Peaches and Cream are particularly well-suited for grilling due to their high sugar content and tender kernels.
It’s important to note that corn’s sweetness diminishes over time, so grilling soon after harvest is optimal. Careful selection of corn based on these criteria can significantly enhance the flavor, tenderness, and overall quality of grilled corn on the cob.
Key Takeaways
- Look for fresh corn with bright green husks and golden brown silk
- Remove the husks and silk before grilling
- Experiment with different seasonings like butter, salt, and herbs
- Grill the corn over medium heat for 10-15 minutes, turning occasionally
- Check for a golden brown color and caramelized spots to determine when the corn is ready
Preparing the Corn for Grilling
Removing Husks and Silk
Before grilling corn on the cob, it’s essential to properly prepare the ears to ensure they cook evenly and develop a delicious charred flavor. Start by carefully peeling back the husks, but leave them attached at the base of the ear. Remove the silk from the corn by hand or using a vegetable brush, making sure to remove as much of it as possible.
Soaking and Re-Husking
Once the silk has been removed, carefully pull the husks back up over the ear of corn. If desired, you can also soak the ears of corn in cold water for 10-15 minutes before grilling. This will help prevent the husks from burning on the grill and will also add some moisture to the corn as it cooks.
Alternative Method: Foil Wrapping
Another popular method for preparing corn on the cob for grilling is to remove the husks entirely and wrap the ears in aluminum foil. This method allows for direct contact with the grill, resulting in a slightly charred and smoky flavor. To do this, simply remove the husks and silk from the ears of corn, then wrap each ear individually in aluminum foil. Be sure to seal the foil tightly to prevent any juices from leaking out during grilling. This method is especially popular for adding seasonings and flavorings to the corn before grilling, as it allows for easy customization of each ear.
Seasoning and Flavoring Options
When it comes to seasoning and flavoring grilled corn on the cob, there are countless options to choose from. One classic method is to simply brush the ears of corn with melted butter and sprinkle them with salt and pepper before grilling. This simple seasoning allows the natural sweetness of the corn to shine through while adding a rich and savory flavor.
For a more complex flavor profile, consider mixing melted butter with herbs and spices such as garlic, paprika, or cumin before brushing it onto the ears of corn. This will add depth and complexity to the flavor of the corn while still allowing its natural sweetness to be front and center. Another popular option for seasoning grilled corn on the cob is to create a flavored butter or mayonnaise spread.
This can be done by mixing softened butter or mayonnaise with herbs, spices, citrus zest, or grated cheese. Once mixed, spread this mixture onto the ears of corn before grilling for a flavorful and creamy finish. For a spicy kick, consider adding hot sauce or chili powder to the butter or mayonnaise mixture.
This will add heat and depth to the flavor of the corn while creating a delicious contrast to its natural sweetness. Additionally, consider adding a squeeze of fresh lime juice or a sprinkle of grated Parmesan cheese to grilled corn on the cob for a burst of bright acidity and umami richness. By experimenting with different seasonings and flavorings, you can create a customized grilled corn on the cob that perfectly suits your taste preferences.
Grilling Techniques and Tips
| Technique | Tips |
|---|---|
| Direct Heat | Cook thin and small cuts of meat directly over the heat source for quick cooking. |
| Indirect Heat | Cook larger cuts of meat away from the heat source to prevent burning while ensuring thorough cooking. |
| Grilling Vegetables | Use a grill basket or skewers to prevent small vegetables from falling through the grates. |
| Marinating | Marinate meat for at least 30 minutes to add flavor and tenderize the meat. |
| Resting Meat | Allow grilled meat to rest for a few minutes before slicing to retain juices and tenderness. |
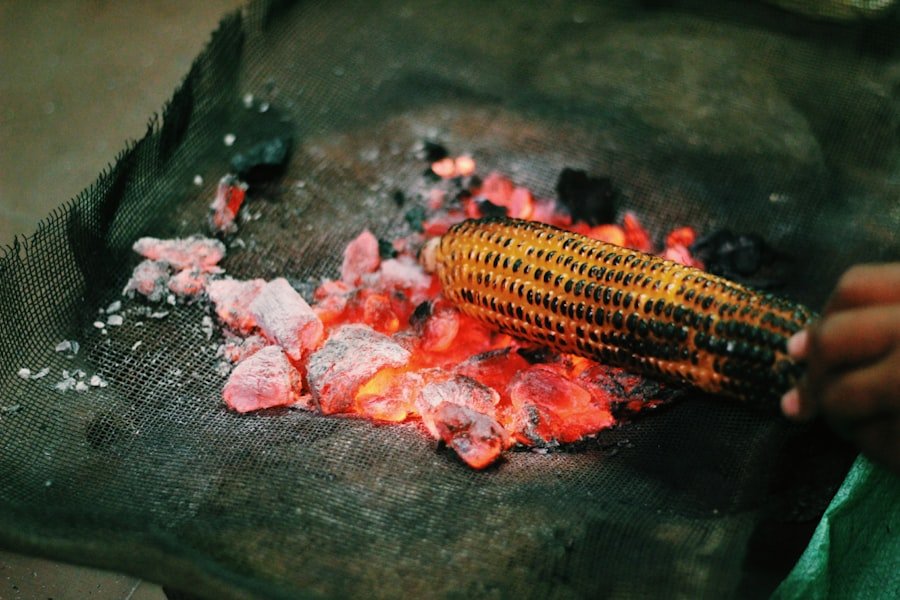
Grilling corn on the cob is a simple and straightforward process, but there are a few techniques and tips that can help ensure success. When grilling corn in its husk, place the prepared ears directly on a preheated grill over medium heat. Cook for 15-20 minutes, turning occasionally, until the husks are charred and slightly blackened in spots.
The husks will help protect the kernels from direct heat while allowing them to steam and develop a smoky flavor. If grilling corn in aluminum foil, place the wrapped ears directly on the grill over medium heat and cook for 15-20 minutes, turning occasionally. The foil will help trap moisture and heat around the corn, resulting in tender kernels with a slightly charred flavor.
For added flavor and char, consider grilling the ears of corn directly on the grill grates after they have been cooked in their husks or foil. This will give them a delicious smoky flavor and attractive grill marks. Simply remove the husks or foil from the cooked ears of corn and place them directly on the grill over medium-high heat.
Cook for 2-3 minutes per side, turning occasionally, until lightly charred all over. This additional step will add depth and complexity to the flavor of the grilled corn while creating an appealing visual presentation. To prevent burning or charring, be sure to keep a close eye on the ears of corn while they are grilling.
Turn them frequently to ensure even cooking and to prevent any hot spots on the grill from causing uneven charring. Additionally, be mindful of flare-ups from any excess butter or oil that may drip onto the grill grates. By following these grilling techniques and tips, you can achieve perfectly cooked grilled corn on the cob with a delicious smoky flavor and attractive charred appearance.
Determining When the Corn is Ready
Determining when grilled corn on the cob is ready can be done by using both visual cues and physical touch. When grilling corn in its husk, look for charred spots on the outside of the husk as well as a slight browning of the exposed kernels at the top of each ear. The husks should also feel dry and slightly crispy to the touch when they are ready to be removed from the grill.
If grilling corn in aluminum foil, look for slight browning or charring on the outside of the foil as well as a fragrant aroma coming from within. To check for doneness using physical touch, carefully peel back a small section of husk or foil from one ear of corn using tongs or oven mitts to protect your hands from heat. The kernels should be tender when pierced with a fork or knife, indicating that they are fully cooked and ready to be enjoyed.
If there is any resistance when piercing the kernels, continue grilling for an additional 5-10 minutes before checking again. Another method for determining when grilled corn on the cob is ready is to use an instant-read thermometer inserted into one of the kernels at an angle towards the center of each ear. The internal temperature should register between 150-160°F (65-71°C) when fully cooked.
By using these visual cues and physical touch methods, you can confidently determine when grilled corn on the cob is ready to be served.
Serving and Enjoying Grilled Corn on the Cob

Serving Grilled Corn on the Cob
Once grilled corn on the cob is ready, it’s time to serve and enjoy this delicious summer treat. Remove any remaining husks or foil from each ear of corn using tongs or oven mitts to protect your hands from heat. Place them on a serving platter or individual plates for easy access.
Classic Presentation and Customization
For a classic presentation, serve grilled corn on the cob with additional melted butter, salt, pepper, and fresh herbs such as parsley or chives for garnish. This allows guests to customize their grilled corn with their favorite seasonings while enjoying its natural sweetness and smoky flavor.
Build-Your-Own Grilled Corn Bar
Another popular serving option is to create a build-your-own grilled corn bar with an assortment of flavored butters, mayonnaise spreads, grated cheeses, herbs, spices, hot sauces, and citrus wedges for guests to choose from. This interactive serving style allows everyone to create their own customized grilled corn on the cob with their favorite flavors and seasonings.
Tips for Serving and Enjoying
For a unique twist, consider cutting grilled corn on the cob into smaller pieces before serving for easier handling and eating. This also allows for easier sharing among guests and makes it easier to enjoy multiple flavors in one sitting. No matter how you choose to serve grilled corn on the cob, be sure to enjoy it while it’s still warm for maximum flavor and tenderness.
Variations and Creative Twists
While classic grilled corn on the cob is delicious on its own, there are countless variations and creative twists that can take this summer staple to new heights. One popular variation is Mexican street-style grilled corn, also known as elote. This flavorful twist features grilled corn slathered in mayonnaise or sour cream, then rolled in crumbled cotija cheese before being sprinkled with chili powder and finished with a squeeze of fresh lime juice.
For a Mediterranean-inspired twist, consider brushing grilled corn on the cob with olive oil infused with garlic and herbs such as oregano or thyme before finishing with a sprinkle of crumbled feta cheese and chopped fresh mint. For a sweet and spicy twist, brush grilled corn on the cob with honey or maple syrup mixed with hot sauce before finishing with a sprinkle of smoked paprika or cayenne pepper. Another creative twist is to create grilled corn salad by cutting grilled kernels off each ear of corn then tossing them with diced tomatoes, red onion, bell peppers, cilantro, lime juice, olive oil, salt, pepper, and a pinch of cumin for a refreshing side dish or topping for tacos.
By experimenting with different flavors and ingredients, you can create unique variations and creative twists on classic grilled corn on the cob that will impress your guests and elevate your summer cookouts.
If you’re looking for more grilling tips and tricks, be sure to check out this article on Grill Offers. They have a wealth of information on everything from grilling techniques to the best tools and equipment for your outdoor cooking adventures.


