
Perfect Grilled Chicken: 30 Minutes
When selecting chicken for grilling, it is important to consider the various cuts available, including whole chickens, breasts, thighs, and drumsticks. Each cut offers distinct characteristics in terms of flavor, texture, and cooking properties. Chicken breasts are a lean option, containing less fat and fewer calories compared to other cuts.
They are versatile and suitable for a wide range of recipes. Thighs and drumsticks, on the other hand, have a higher fat content, resulting in a juicier and more flavorful meat when grilled. For those considering grilling a whole chicken, the size and weight of the bird are crucial factors.
Smaller chickens typically require less cooking time, while larger birds may need extended grilling periods to ensure thorough cooking. The choice of chicken cut should be based on the specific recipe requirements and personal taste preferences. White meat, found in chicken breasts, offers a milder flavor, while dark meat from thighs and drumsticks provides a richer taste profile.
Ultimately, the selection of chicken for grilling depends on individual preferences, nutritional considerations, and the intended culinary application. Each cut of chicken can be successfully grilled when proper techniques and cooking times are applied.
Key Takeaways
- Choose chicken with skin-on and bone-in for juicier and more flavorful grilled chicken
- Create a marinade with a balance of acidity, sweetness, and savory flavors for maximum taste
- Pat the chicken dry before marinating to ensure the flavors penetrate the meat
- Preheat the grill to medium-high heat for perfectly grilled chicken with crispy skin
- Grill the chicken over direct heat for 5-7 minutes per side, then move to indirect heat to finish cooking
- Use a meat thermometer to check for an internal temperature of 165°F for safe consumption
- Serve the grilled chicken with fresh herbs and lemon wedges for a delicious and satisfying meal
Preparing the Marinade
Key Components of a Marinade
When preparing a marinade for your chicken, there are several key components to consider. First and foremost, you’ll want to include an acidic ingredient in your marinade, such as lemon juice, vinegar, or yogurt. The acid helps break down the proteins in the chicken, making it more tender and allowing the flavors of the marinade to penetrate the meat. Additionally, you’ll want to include some oil in your marinade to help keep the chicken moist during grilling. Olive oil, vegetable oil, or even coconut oil are all great options for this purpose.
Adding Flavor and Balance
In addition to acid and oil, you’ll want to include plenty of flavorings in your marinade, such as herbs, spices, and aromatics. Garlic, ginger, rosemary, thyme, paprika, and cumin are just a few examples of ingredients that can add depth and complexity to your marinade. You can also add sweetness with ingredients like honey or brown sugar for a balanced flavor profile.
The Importance of Balance
Ultimately, the key to a successful marinade is balance. You’ll want to ensure that your marinade has a good balance of acid, oil, and flavorings to create a delicious and well-seasoned chicken that is perfect for grilling. By considering these key components and finding the right balance, you’ll be able to create a marinade that will elevate your grilled chicken to the next level.
Preparing the Chicken
Once you have chosen the right type of chicken and prepared your marinade, it’s time to prepare the chicken for grilling. This step involves ensuring that the chicken is clean and properly seasoned before it hits the grill. Start by rinsing the chicken under cold water and patting it dry with paper towels.
This helps remove any excess moisture from the surface of the chicken, which can prevent it from achieving a nice sear on the grill. Next, season the chicken generously with salt and pepper on both sides. This simple seasoning not only enhances the natural flavor of the chicken but also helps create a delicious crust when grilled.
If you’re using a whole chicken or larger pieces like thighs or drumsticks, you may want to consider scoring the meat with a sharp knife before marinating it. This allows the marinade to penetrate deeper into the meat and ensures that every bite is packed with flavor. Finally, transfer the seasoned chicken to a resealable plastic bag or a shallow dish and pour the marinade over it.
Make sure that all parts of the chicken are well coated with the marinade before sealing the bag or covering the dish with plastic wrap. Allow the chicken to marinate in the refrigerator for at least 30 minutes or up to 24 hours for maximum flavor infusion. Once you have chosen the right type of chicken and prepared your marinade, it’s time to prepare the chicken for grilling.
This step involves ensuring that the chicken is clean and properly seasoned before it hits the grill. Start by rinsing the chicken under cold water and patting it dry with paper towels. This helps remove any excess moisture from the surface of the chicken, which can prevent it from achieving a nice sear on the grill.
Next, season the chicken generously with salt and pepper on both sides. This simple seasoning not only enhances the natural flavor of the chicken but also helps create a delicious crust when grilled. If you’re using a whole chicken or larger pieces like thighs or drumsticks, you may want to consider scoring the meat with a sharp knife before marinating it.
This allows the marinade to penetrate deeper into the meat and ensures that every bite is packed with flavor. Finally, transfer the seasoned chicken to a resealable plastic bag or a shallow dish and pour the marinade over it. Make sure that all parts of the chicken are well coated with the marinade before sealing the bag or covering the dish with plastic wrap.
Allow the chicken to marinate in the refrigerator for at least 30 minutes or up to 24 hours for maximum flavor infusion.
Preheating the Grill
| Temperature | Time | Ideal Food |
|---|---|---|
| High heat (450-550°F) | 15-20 minutes | Steaks, burgers, seafood |
| Medium heat (350-450°F) | 10-15 minutes | Chicken, pork chops, vegetables |
| Low heat (250-350°F) | 5-10 minutes | Thicker cuts of meat, whole poultry |
Before you start grilling your marinated chicken, it’s important to preheat your grill properly to ensure even cooking and delicious char marks on your meat. Whether you’re using a gas grill or a charcoal grill, there are specific steps you should follow to get your grill ready for cooking. If you’re using a gas grill, start by turning on all burners to high heat and closing the lid.
Allow the grill to preheat for at least 10-15 minutes before lowering the heat as needed for cooking. This initial high heat will help clean off any residue from previous grilling sessions and ensure that your grill grates are hot enough for searing your chicken. On the other hand, if you’re using a charcoal grill, start by lighting your charcoal briquettes using either a chimney starter or lighter fluid.
Once your coals are hot and covered with ash (usually after about 15-20 minutes), spread them out evenly across the bottom of your grill for an even cooking surface. Regardless of which type of grill you’re using, it’s important to clean your grill grates with a wire brush before preheating them. This helps remove any leftover food particles from previous grilling sessions and prevents sticking during cooking.
By preheating your grill properly before cooking your marinated chicken, you’ll ensure that it cooks evenly and develops those coveted grill marks that add extra flavor and visual appeal to your dish. Before you start grilling your marinated chicken, it’s important to preheat your grill properly to ensure even cooking and delicious char marks on your meat. Whether you’re using a gas grill or a charcoal grill, there are specific steps you should follow to get your grill ready for cooking.
If you’re using a gas grill, start by turning on all burners to high heat and closing the lid. Allow the grill to preheat for at least 10-15 minutes before lowering the heat as needed for cooking. This initial high heat will help clean off any residue from previous grilling sessions and ensure that your grill grates are hot enough for searing your chicken.
On the other hand, if you’re using a charcoal grill, start by lighting your charcoal briquettes using either a chimney starter or lighter fluid. Once your coals are hot and covered with ash (usually after about 15-20 minutes), spread them out evenly across the bottom of your grill for an even cooking surface. Regardless of which type of grill you’re using, it’s important to clean your grill grates with a wire brush before preheating them.
This helps remove any leftover food particles from previous grilling sessions and prevents sticking during cooking. By preheating your grill properly before cooking your marinated chicken, you’ll ensure that it cooks evenly and develops those coveted grill marks that add extra flavor and visual appeal to your dish.
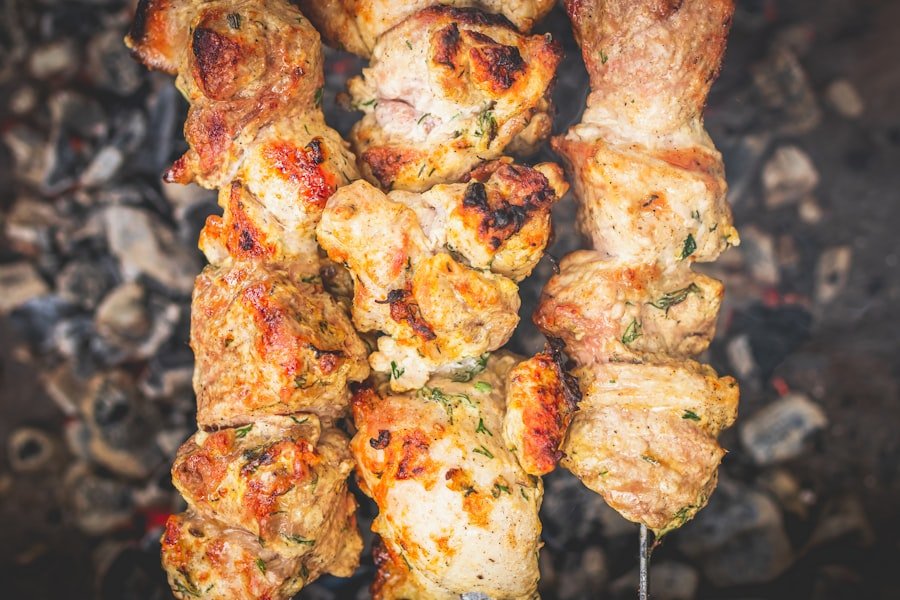
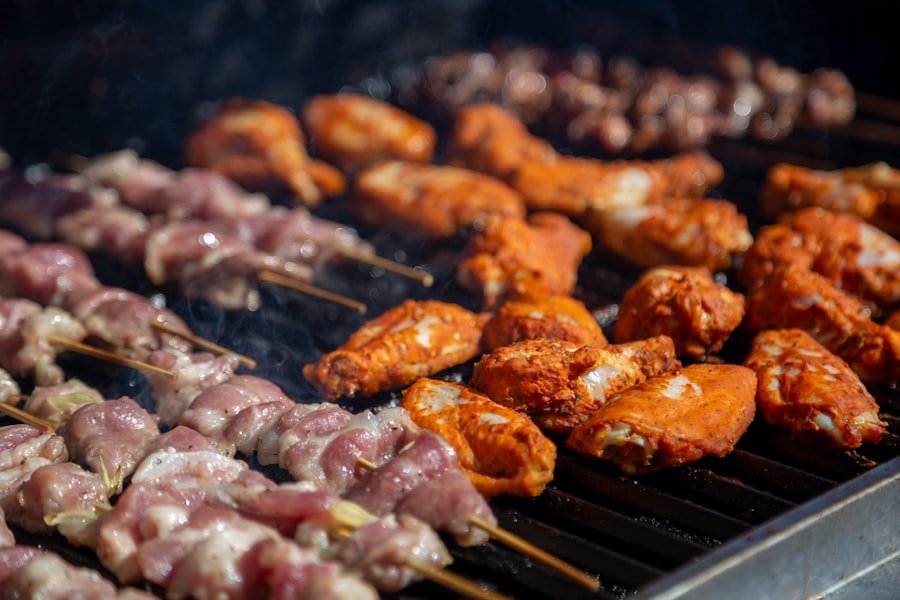
Grilling the Chicken
Once your grill is preheated and ready for cooking, it’s time to start grilling your marinated chicken. The key to successful grilling is achieving those beautiful grill marks while ensuring that your chicken cooks through evenly without burning. Start by removing the marinated chicken from its container and shaking off any excess marinade before placing it on the hot grill grates.
Be sure not to overcrowd the grill so that each piece of chicken has enough space for even cooking. Close the lid of your grill and let the chicken cook undisturbed for several minutes before flipping it over with tongs. This allows each side of the chicken to develop those coveted grill marks while sealing in its juices for maximum flavor.
As you continue grilling your marinated chicken, be sure to monitor its progress closely and adjust heat levels as needed to prevent burning or undercooking. Use an instant-read thermometer inserted into the thickest part of each piece of chicken to ensure that it reaches an internal temperature of 165°F (74°C) before removing it from the grill. By following these steps and paying close attention to your marinated chicken as it cooks on the grill, you’ll achieve perfectly grilled chicken that is juicy, flavorful, and beautifully charred.
Checking for Doneness
Why Checking for Doneness Matters
Checking for doneness is a crucial step when grilling chicken to ensure that it is safe to eat while still being juicy and flavorful. There are several methods you can use to check if your grilled chicken is fully cooked without cutting into it prematurely.
Using an Instant-Read Thermometer
The most accurate way to check for doneness is by using an instant-read thermometer inserted into the thickest part of each piece of grilled chicken. The internal temperature should reach 165°F (74°C) before removing it from the grill. This ensures that any harmful bacteria present in raw poultry are killed off while still maintaining juicy meat.
Alternative Methods for Checking Doneness
If you don’t have an instant-read thermometer on hand, another method for checking doneness is by making a small incision near the bone of one piece of grilled chicken with a sharp knife. If there are no traces of pink or bloody juices running out from inside when pierced with a knife or fork, then this indicates that it’s fully cooked through.
If you’re looking for more grilling tips and recipes, be sure to check out the article on “The Best Electric Mower Robot Review” on Grilloffers.com. This article provides a comprehensive review of electric mower robots, perfect for keeping your lawn in top shape while you focus on perfecting your grilling skills. (source)


