
Selecting the appropriate chicken breast for grilling is essential for optimal results. Fresh chicken breasts should appear plump with a light pink color. Avoid any chicken that shows signs of spoilage, such as discoloration, strong odors, or a slimy texture.
Organic or free-range chicken breasts may offer superior flavor and texture due to their natural diet and living conditions. The thickness of the chicken breast is a crucial factor in grilling. Choose cuts that are uniform in size and thickness to ensure even cooking.
If there are variations in thickness, use a meat mallet to pound the breasts to a consistent thickness. This technique promotes even cooking and prevents dryness in thinner areas while thicker parts finish cooking. Quality, freshness, and uniform thickness are key considerations when selecting chicken breasts for grilling.
Choosing chicken breasts that meet these criteria will contribute to a well-cooked and flavorful grilled dish.
Key Takeaways
- Choose boneless, skinless chicken breasts for grilling as they cook more evenly and quickly
- Pound the chicken breasts to an even thickness for uniform cooking
- Use a dry rub or marinade to add flavor and tenderize the chicken before grilling
- Preheat the grill to medium-high heat and oil the grates to prevent sticking
- Use a meat thermometer to check for an internal temperature of 165°F to ensure the chicken is fully cooked
- Let the grilled chicken breast rest for a few minutes before serving to allow the juices to redistribute
- If the chicken is sticking to the grill, clean and oil the grates before grilling or use a grill basket for easier cooking
Preparing the Chicken Breast for Grilling
Step 1: Clean and Dry the Chicken
Before grilling chicken breast, it’s essential to properly prepare the meat to ensure optimal flavor and texture. Start by rinsing the chicken breasts under cold water and patting them dry with paper towels. This will help remove any excess moisture and bacteria from the surface of the meat.
Step 2: Trim Excess Fat and Skin
Next, trim any excess fat or skin from the chicken breasts using a sharp knife. Removing excess fat will prevent flare-ups on the grill and help the chicken cook more evenly.
Adding Flavor with Marinades or Seasonings
Once the chicken breasts are rinsed, dried, and trimmed, consider marinating them for added flavor and tenderness. Marinating the chicken breasts in a mixture of oil, acid (such as lemon juice or vinegar), and seasonings can help tenderize the meat and infuse it with delicious flavors. Alternatively, you can also season the chicken breasts with a dry rub consisting of herbs, spices, and salt before grilling. This will create a flavorful crust on the outside of the chicken while keeping the inside juicy and tender.
The Final Result: Delicious Grilled Chicken Breast
In summary, preparing the chicken breast for grilling involves rinsing, drying, trimming, and optionally marinating or seasoning the meat. By taking the time to properly prepare the chicken breasts, you can ensure a delicious and flavorful grilled chicken breast.
Seasoning and Marinating Techniques

When it comes to seasoning and marinating chicken breast for grilling, there are countless techniques and flavor combinations to explore. One popular method is to create a simple marinade using oil, acid (such as lemon juice or vinegar), and a variety of herbs and spices. For example, you can combine olive oil, balsamic vinegar, garlic, rosemary, thyme, salt, and pepper to create a flavorful marinade for grilled chicken breast.
Allow the chicken breasts to marinate in the mixture for at least 30 minutes or up to 24 hours in the refrigerator to maximize flavor infusion. Another option for seasoning chicken breast is to use a dry rub consisting of herbs, spices, salt, and sugar. Common ingredients in a dry rub include paprika, cumin, chili powder, garlic powder, onion powder, brown sugar, salt, and pepper.
Generously coat the chicken breasts with the dry rub mixture before grilling to create a flavorful crust on the outside of the meat. For those looking to add a kick of heat to their grilled chicken breast, consider incorporating spicy ingredients such as cayenne pepper, crushed red pepper flakes, or hot sauce into the marinade or dry rub. This will add a fiery flavor to the chicken that is sure to please spice enthusiasts.
In conclusion, there are numerous seasoning and marinating techniques to enhance the flavor of grilled chicken breast. Whether using a simple marinade, a complex dry rub, or incorporating spicy ingredients, experimenting with different flavor combinations can elevate the taste of grilled chicken breast.
Grilling Techniques for Perfect Chicken Breast
| Grilling Technique | Temperature | Time | Result |
|---|---|---|---|
| Direct Heat | Medium-High (375-450°F) | 6-8 minutes per side | Juicy and flavorful |
| Indirect Heat | Medium (350-375°F) | 20-25 minutes | Tender and evenly cooked |
| Marinating | N/A | 2-4 hours | Enhanced flavor |
| Brining | N/A | 1-2 hours | Moist and tender |
Grilling chicken breast requires careful attention to heat management and timing to achieve perfectly cooked meat. Start by preheating your grill to medium-high heat (around 375-400°F) and lightly oiling the grates to prevent sticking. Once the grill is hot, place the seasoned or marinated chicken breasts on the grates and close the lid.
When grilling chicken breast, it’s important to avoid constantly flipping or moving the meat around on the grill. Allow the chicken breasts to cook undisturbed for 6-7 minutes on one side before flipping them over with tongs. This will help create beautiful grill marks and prevent the meat from sticking to the grates.
To ensure even cooking, consider using an indirect grilling method by turning off one burner (for gas grills) or banking the coals to one side (for charcoal grills) after searing the chicken breasts over direct heat. This will allow the chicken to finish cooking through without burning on the outside. For those looking to infuse additional smoky flavor into their grilled chicken breast, consider adding wood chips or chunks to the grill.
Soak wood chips in water for at least 30 minutes before placing them directly on the coals (for charcoal grills) or in a smoker box (for gas grills). This will create aromatic smoke that will flavor the chicken as it cooks. In summary, mastering grilling techniques such as preheating the grill, managing heat levels, using indirect heat, and incorporating wood smoke can help achieve perfectly grilled chicken breast.
Checking for Doneness
Checking for doneness is crucial when grilling chicken breast to ensure that it is safe to eat while maintaining optimal juiciness and flavor. The most reliable method for checking doneness is to use an instant-read meat thermometer inserted into the thickest part of the chicken breast. The internal temperature should reach 165°F to ensure that any harmful bacteria are killed off.
If you don’t have an instant-read thermometer on hand, you can also check for doneness by making a small incision in the thickest part of the chicken breast with a sharp knife. The juices should run clear without any traces of pink or blood when the chicken is fully cooked. Another way to check for doneness is by gently pressing on the thickest part of the chicken breast with your finger.
If it feels firm and springs back when touched, it is likely done. However, this method is less reliable than using a meat thermometer or checking for clear juices. In conclusion, checking for doneness is essential when grilling chicken breast to ensure that it is safe to eat while maintaining optimal juiciness and flavor.
Using an instant-read thermometer or checking for clear juices are reliable methods for determining when grilled chicken breast is fully cooked.
Resting and Serving the Grilled Chicken Breast
The Importance of Resting Grilled Chicken Breast
Allowing the Chicken to Rest
After grilling chicken breast to perfection, it’s essential to let it rest before serving to ensure maximum juiciness and tenderness. Transfer the grilled chicken breasts to a clean plate or cutting board and loosely tent them with aluminum foil. Let them rest for 5-10 minutes before slicing or serving.
The Benefits of Resting
Resting allows the juices in the meat to redistribute evenly throughout the chicken breasts, resulting in juicier and more flavorful meat. Additionally, resting gives the muscle fibers in the meat time to relax, making it more tender and enjoyable to eat.
Serving and Pairing Options
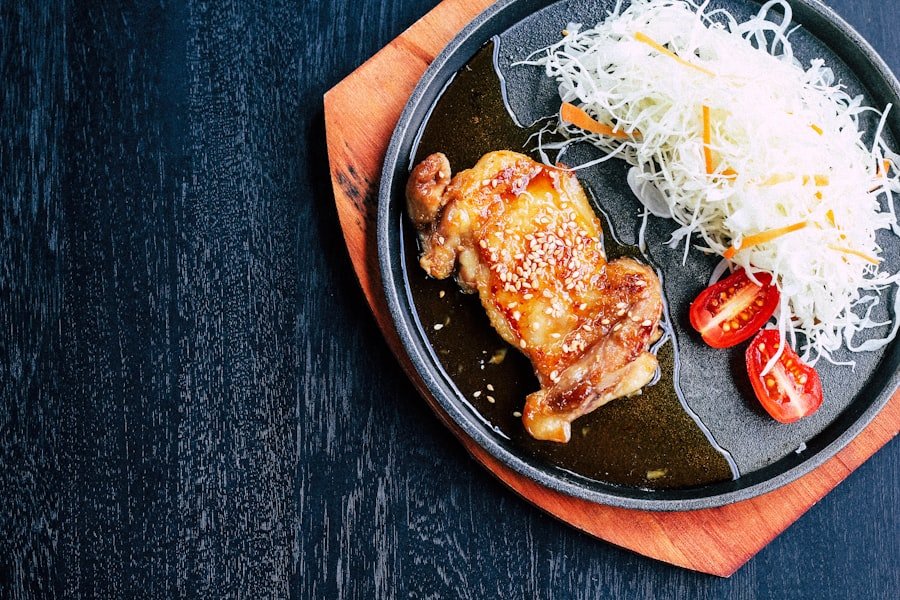
Once rested, slice the grilled chicken breast against the grain into thin strips or serve it whole alongside your favorite side dishes. Grilled chicken breast pairs well with a variety of accompaniments such as salads, roasted vegetables, rice pilaf, or mashed potatoes.
Maximizing Juiciness and Tenderness
In summary, allowing grilled chicken breast to rest before serving is crucial for maximizing juiciness and tenderness. Slicing against the grain and serving with complementary side dishes can elevate the presentation and enjoyment of grilled chicken breast.
Troubleshooting Common Grilling Issues
Grilling chicken breast can sometimes present challenges such as dryness, sticking to the grill grates, uneven cooking, or undercooking. To address these common grilling issues, consider implementing some troubleshooting techniques. To prevent dryness in grilled chicken breast, be mindful of overcooking and consider using a meat thermometer to check for doneness.
Additionally, marinating or brining the chicken before grilling can help retain moisture and tenderness. If your grilled chicken breast is sticking to the grill grates, make sure they are properly oiled before placing the meat on them. You can also brush oil directly onto the surface of the chicken before grilling to prevent sticking.
To address uneven cooking in grilled chicken breast due to varying thicknesses, consider pounding the meat to an even thickness before grilling or using an indirect grilling method to finish cooking without burning. If you find that your grilled chicken breast is undercooked despite reaching 165°F internal temperature, consider finishing it in a preheated oven at 350°F until fully cooked through. In conclusion, troubleshooting common grilling issues such as dryness, sticking, uneven cooking, or undercooking can be addressed by implementing techniques such as monitoring temperature with a thermometer, proper oiling of grill grates, using indirect heat methods, and finishing in an oven if necessary.
If you’re looking for a convenient way to keep your lawn looking great while you grill up some delicious chicken breast, you might want to consider investing in a robotic lawnmower. Check out this review to learn more about how these innovative machines can make lawn maintenance a breeze.