
When selecting a steak for grilling, the choice of cut is essential. Various cuts offer different flavors and textures. The ribeye, from the rib section, is well-marbled, tender, and flavorful.
The New York strip, from the loin, is leaner but still offers a balance of tenderness and taste. The filet mignon, from the tenderloin, is known for its buttery texture and mild flavor. For optimal grilling, choose steaks at least 1 inch thick to ensure even cooking.
The quality of the meat is also crucial. Look for steaks with a bright red color and good marbling throughout. Marbling, the intramuscular fat, contributes to the steak’s flavor and juiciness when cooked.
Grass-fed or organic steaks often provide richer flavor and higher nutritional value. Selecting the appropriate cut and quality of steak is fundamental to achieving excellent grilling results.
Key Takeaways
- Choose a cut of steak that suits your preference, such as ribeye for marbling or sirloin for leaner meat.
- Pat the steak dry and bring it to room temperature before grilling to ensure even cooking.
- Season the steak generously with salt and pepper, and consider adding other spices or marinades for extra flavor.
- Preheat the grill to high heat to create a sear on the steak and lock in juices.
- Grill the steak for the recommended time based on its thickness and desired doneness, flipping once halfway through.
- Use a meat thermometer to check for doneness, aiming for 130°F for medium-rare or 145°F for medium.
- Let the steak rest for a few minutes before slicing and serving to allow the juices to redistribute and ensure a juicy, flavorful steak.
Preparing the Steak for Grilling
Letting the Steak Come to Room Temperature
Once you’ve selected the perfect cut of steak, it’s time to prepare it for grilling. Start by taking the steak out of the refrigerator and allowing it to come to room temperature for about 30 minutes. This will help the steak cook more evenly on the grill.
Trimming Excess Fat and Drying the Steak
While the steak is coming to temperature, take this time to trim any excess fat from the edges of the steak. While some fat is necessary for flavor and juiciness, too much can cause flare-ups on the grill and lead to uneven cooking. Next, pat the steak dry with paper towels to remove any excess moisture. This will help ensure a nice sear on the outside of the steak when it hits the grill.
Adding a Crusty Exterior (Optional)
If you’d like, you can also lightly coat the steak with a high-heat oil such as canola or grapeseed oil to help prevent sticking on the grill. Finally, if you prefer your steak with a crusty exterior, consider sprinkling a thin layer of kosher salt on both sides of the steak and letting it sit for about 40 minutes before grilling. This process, known as dry brining, helps draw out moisture from the surface of the steak, resulting in a beautifully caramelized crust when grilled.
The Result: A Deliciously Grilled Steak
By taking the time to properly prepare your steak for grilling, you’ll ensure that it cooks evenly and develops a delicious crust on the outside.
Seasoning the Steak

Seasoning your steak is an essential step in creating a flavorful and delicious grilled masterpiece. While some purists may argue that a good quality steak doesn’t need much more than salt and pepper, there are countless seasoning options to consider that can enhance the natural flavors of the meat. One classic seasoning option is a simple blend of kosher salt and freshly ground black pepper.
This combination allows the natural flavors of the steak to shine while adding just enough seasoning to enhance its taste. For those looking to add a bit more flavor, consider creating a dry rub using a combination of herbs and spices such as garlic powder, onion powder, paprika, and dried herbs like thyme or rosemary. This blend can be rubbed onto the steak before grilling to add depth and complexity to the flavor profile.
Another popular option is to marinate the steak in a mixture of oil, acid (such as vinegar or citrus juice), and seasonings for several hours before grilling. This method infuses the steak with additional flavor and can also help tenderize tougher cuts of meat. No matter which seasoning method you choose, be sure to apply it generously to both sides of the steak and gently press it into the meat to ensure it adheres.
By taking the time to season your steak properly, you’ll elevate its flavor and create a truly memorable grilling experience.
Preheating the Grill
| Temperature | Time | Ideal Food |
|---|---|---|
| High heat (450-550°F) | 15-20 minutes | Steaks, burgers, seafood |
| Medium heat (350-450°F) | 10-15 minutes | Chicken, pork chops, vegetables |
| Low heat (250-350°F) | 5-10 minutes | Thicker cuts of meat, whole poultry |
Before you begin grilling your steak, it’s important to preheat your grill to ensure even cooking and a beautiful sear on the outside of the meat. Start by cleaning your grill grates with a wire brush to remove any leftover residue from previous grilling sessions. Then, depending on your type of grill (gas or charcoal), follow these steps to preheat: For gas grills: Turn all burners to high and close the lid.
Allow the grill to preheat for 10-15 minutes until it reaches a temperature of at least 500°F (260°C). This high heat will help create a nice sear on the outside of the steak. For charcoal grills: Fill a chimney starter with charcoal and light it according to the manufacturer’s instructions.
Once the coals are covered with white ash, carefully pour them onto one side of the grill. Place the grill grate on top and allow it to preheat for 10-15 minutes with the lid on. By preheating your grill properly, you’ll create an ideal cooking environment for your steak and ensure that it cooks evenly and develops a delicious crust.
Grilling the Steak
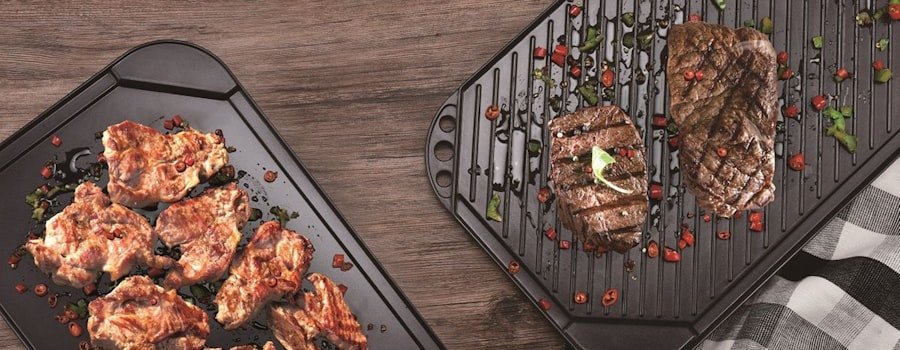
Once your grill is preheated, it’s time to start grilling your steak. Begin by placing the seasoned steak onto the hottest part of the grill grates. For gas grills, this will be directly over the burners, while for charcoal grills, this will be directly over the coals.
Allow the steak to sear without moving it for 2-3 minutes until it develops a nice crust on the bottom. After this initial sear, use tongs to flip the steak over and sear the other side for an additional 2-3 minutes. This will help lock in juices and create a flavorful crust on both sides of the steak.
Once both sides are seared, move the steak to a cooler part of the grill (indirect heat) or reduce the heat on a gas grill to medium-low. Continue cooking the steak for an additional 4-6 minutes per side, depending on your desired level of doneness. For those who prefer their steaks rare, aim for an internal temperature of 125°F (52°C).
For medium-rare, aim for 135°F (57°C), for medium, aim for 145°F (63°C), and for medium-well, aim for 155°F (68°C). Use an instant-read meat thermometer inserted into the thickest part of the steak to check for doneness. By following these grilling techniques, you’ll achieve a perfectly cooked steak with a beautiful crust on the outside and juicy, tender meat on the inside.
Checking for Doneness
Visual Cues
One simple way to check for doneness is by visually inspecting the color and texture of the steak. A rare steak will be bright red in the center with a cool, soft texture. A medium-rare steak will have a warm red center with more firmness, while a medium steak will have a pink center with some firmness but still be slightly soft. A medium-well steak will have only a slight hint of pink in the center with firmness throughout.
Touch Test
Another method for checking doneness is by using the touch test. By pressing on different parts of the steak with your finger and comparing it to different parts of your hand (such as touching your thumb to your index finger for rare), you can get an idea of how well done your steak is based on its firmness.
Meat Thermometer
The most accurate way to check for doneness is by using an instant-read meat thermometer. Insert it into the thickest part of the steak without touching bone or fat, and refer to recommended internal temperatures for your desired level of doneness.
By using these methods in combination, you can ensure that your grilled steak reaches your preferred level of doneness and is cooked exactly how you like it.
Letting the Steak Rest and Serving
Once your grilled steak has reached your desired level of doneness, it’s important to let it rest before serving. This allows the juices within the meat to redistribute evenly, resulting in a more tender and flavorful eating experience. To let your steak rest, transfer it to a clean cutting board or plate and loosely tent it with aluminum foil for about 5-10 minutes.
During this resting period, take this time to prepare any additional side dishes or garnishes you’d like to serve alongside your steak. Whether it’s a simple green salad or a loaded baked potato, having everything ready will ensure that your meal is served hot and fresh. After letting your steak rest, use a sharp knife to slice it against the grain into thin strips.
This will help ensure tenderness and make it easier to eat. Arrange the sliced steak on a platter or individual plates and serve immediately alongside your chosen sides. By allowing your grilled steak to rest before serving and taking care in how you slice and present it, you’ll create a memorable dining experience that showcases all of your hard work and attention to detail.
In conclusion, grilling the perfect steak requires careful consideration when choosing the right cut of meat, proper preparation techniques, thoughtful seasoning choices, precise grilling methods, accurate doneness checks, and attention to resting and serving practices. By following these steps and taking care at each stage of the process, you’ll be rewarded with a deliciously grilled steak that’s sure to impress family and friends alike. So fire up that grill, select your favorite cut of steak, and get ready to savor every juicy bite!
If you’re looking to up your grilling game, you might also be interested in the Gardena 15101-41 Sileno Life Automatic Robotic Lawn Mower. This innovative device takes the hassle out of lawn maintenance, allowing you to focus on perfecting your steak grilling skills. Check out our review here to see how it can help free up your time for more important things, like mastering the art of cooking steak on the grill.