
Mastering the Art of Grilling with a Weber Kettle
So, you’ve got a shiny Weber Kettle and you’re ready to fire it up, but maybe the thought of perfectly grilled steaks or smoky ribs feels a bit… daunting. Don’t worry, you’re not alone! Mastering the Weber Kettle isn’t rocket science, it’s more about understanding a few simple principles and getting a feel for your grill. Think of it as learning to cook with a very expressive, charcoal-powered oven. In this guide, we’ll break down what you need to know to go from newbie to grill master, covering everything from getting the fire right to actually cooking delicious food.
Before you even think about lighting a match, let’s talk about what makes a Weber Kettle sing. It’s a deceptively simple piece of equipment, but a few key elements make a big difference.
Your Essential Toolkit
- Chimney Starter: This is your best friend for lighting charcoal. Forget those lighter fluids that can ghost your food with chemical tastes. A chimney starter, filled with briquettes or lump charcoal, and a bit of crumpled newspaper or a starter cube, will get your coals glowing red and ready in about 15-20 minutes. It’s consistent and clean.
- Grill Brush: You really don’t want yesterday’s burnt bits on your fresh dinner. A sturdy grill brush is non-negotiable for cleaning the grates.
- Tongs (Two Pairs, Preferably): One for manipulating charcoal (heavy-duty, heat-resistant), and one for flipping your food. Having two means you won’t be tempted to use your meat tongs for hot coals, which is a recipe for disaster.
- Heat-Resistant Gloves: Your hands will thank you. Grilling involves a lot of heat, and these protect you from accidental burns when adjusting vents, moving coals, or handling hot grates.
- Instant-Read Thermometer: This is perhaps the most crucial tool for ensuring your food is cooked safely and to perfection. Guessing is how you end up with dry chicken or undercooked burgers.
Understanding the Kettle Itself
The Weber Kettle isn’t just a metal bowl with a lid. It’s a sophisticated (for its simplicity) cooking system.
- The Lid: This is where the magic of convection happens. Closing the lid turns your kettle into an oven, circulating heat and smoke for more even cooking and that signature smoky flavor.
- The Vents: These are critical for temperature control. The bottom vent controls the air supply to the coals, affecting how hot they burn. The top vent controls how much heat and smoke escapes, influencing overall temperature and flavor. Learning to adjust these is key to mastering your grill.
- The Grates: These are what your food actually cooks on. Weber Ketttes come with various grate types, but the standard hinged ones are pretty versatile. Keeping them clean and seasoned is important.
If you’re a fan of outdoor cooking, you might find our article on the best accessories for your Weber kettle grill particularly useful. It offers insights into essential tools and gadgets that can enhance your grilling experience, ensuring you get the most out of your grill. To read more, visit this link for detailed information and tips.
The Heart of the Matter: Mastering the Charcoal Fire
This is where many people get stuck. Getting a good, consistent fire is the foundation of everything you’ll cook on a Weber Kettle.
Lighting the Coals: The Right Way
- Chimney Starter Method: As mentioned, this is the gold standard. Fill your chimney starter with the desired amount of charcoal. Place it on the bottom grate of your kettle. Underneath the chimney, place a couple of sheets of crumpled newspaper or a charcoal starter cube. Light the starter material and wait. You’ll see smoke billowing from the top, and in about 15-20 minutes, the coals at the top should be glowing red and covered in a light grey ash.
- How Much Charcoal? This depends on what you’re cooking and for how long. For burgers or thinner steaks for a shorter period, you might need half a chimney. For a long smoke or a large roast, you’ll likely need a full chimney, sometimes even more. It’s better to start with a bit less and add more if needed.
- Lump Charcoal vs. Briquettes:
- Briquettes: Uniform in size and shape, they burn more consistently and for a longer, predictable time. They are often what beginners start with because of their predictability.
- Lump Charcoal: Irregular in shape, it lights faster, burns hotter, and produces less ash. It’s often favored by more experienced grillers for its natural wood flavor. It can be a bit less predictable in burn time and temperature.
Arranging Your Coals for Different Cooking Methods
This is where the “art” really comes in. How you arrange your coals dictates the heat zones on your grill and what you can achieve.
- Direct Heat: This is when your food is cooked directly over the hot coals. It’s perfect for searing steaks, burgers, chicken pieces, and vegetables.
- For Direct Heat: Pour all your lit coals onto one side of the charcoal grate, creating a hot zone. The other side will be cooler. This allows you to sear food over the heat and then move it to the cooler side to finish cooking without burning.
- Indirect Heat: This is when your food is cooked away from the direct heat of the coals, essentially using the kettle as an oven. It’s ideal for larger cuts of meat like roasts, whole chickens, ribs, and anything that needs a longer, gentler cooking time.
- For Indirect Heat: Arrange your lit coals on one side of the charcoal grate. You can create a U-shape or simply pile them to one side. Place a drip pan filled with water or other liquid (like apple juice or broth) on the opposite side of the coals, directly under where your food will be placed. This drip pan serves multiple purposes: it catches drippings, adds moisture to the cooking environment, and helps regulate temperature.
- Two-Zone Grilling (The Best of Both Worlds): This is the most versatile method and what most grill masters rely on. It combines direct and indirect heat zones on the same cook.
- Setting up Two-Zone: As described for direct heat, pile the coals on one side. This creates your “hot zone” for searing. The area over the uncoaled section is your “cool zone” for finishing or gentler cooking. You can then move food between these zones as needed. For example, sear a thick steak over direct heat, then move it to indirect heat to reach its internal temperature without charring the outside.
Controlling Temperature: Your Vent Game
The vents are your primary tool for fine-tuning the temperature. It takes practice to get a feel for it, but here’s the gist:
- Bottom Vent: This is the regulator.
- Closed: Restricts airflow, cooling the fire down significantly.
- Partially Open: Allows more air, increasing the temperature.
- Fully Open: Maximum airflow, hottest fire.
- Top Vent: This controls the exhaust and influences circulation.
- Closed: Traps heat and smoke for a more intense smoky flavor and slower cooking.
- Partially Open: Allows some heat and smoke to escape, moderating temperature and promoting airflow.
- Fully Open: Allows maximum heat and smoke to escape, cooling the grill down faster. It’s often used to reduce temperature quickly or if you’ve accidentally overheated.
Key Principle: For indirect cooking, you often close the top vent somewhat to create that oven-like environment. For direct grilling, you generally want the top vent open enough to allow smoke and heat to escape efficiently.
Finding Your Sweet Spot: Start by aiming for a target temperature (e.g., 300-350°F for indirect, 500-550°F for direct). Light your coals, arrange them, close the lid, and adjust your vents. Monitor the temperature gauge on your lid (remembering it’s an approximation and an instant-read thermometer in the food is king). It might take a few tries to stabilize. Don’t be afraid to open the lid briefly to adjust coals or vents.
Simple Successes: What to Grill First
Don’t dive into a complex brisket on your first go. Start with some crowd-pleasers that will build your confidence.
Burgers: The Backyard Staple
Burgers are forgiving and a fantastic way to get a feel for direct grilling.
- Preparation: Use good quality ground beef, ideally 80/20. Gently form patties, don’t overwork the meat. Make a slight indentation in the center of each patty to prevent them from puffing up into meatballs. Season generously with salt and pepper just before grilling.
- Grilling: Get your kettle ripping hot over direct heat.
- Sear: Place patties on the hot zone and sear for 2-3 minutes per side for a good crust.
- Finish: If you want them more well-done or if they are thick, move them to the cooler side (indirect heat) to finish cooking until they reach your desired internal temperature (160°F for ground beef is the USDA recommended safe temperature).
- Doneness: Use that instant-read thermometer. For medium-rare, aim for around 130-135°F. Medium is around 140-145°F. Well-done will be 160°F+.
Chicken: A Versatile Choice
Chicken can be tricky because it can dry out easily. Indirect heat is your friend here, especially for breasts and whole birds.
- Chicken Breasts:
- Brining: Consider a simple brine (water, salt, sugar) for an hour or two before grilling for extra moisture and flavor.
- Grilling: Start on the indirect side. Cook until the chicken is almost done, then move it over direct heat for a quick sear to get those nice grill marks and a crispy skin (if skin-on). Aim for an internal temperature of 165°F.
- Chicken Thighs: These are more forgiving than breasts due to their higher fat content. They do well over direct heat for a good char, but still benefit from finishing with indirect heat if they are thick.
- Whole Chicken: This is where indirect heat shines. Prepare a whole chicken with your favorite rubs. Set up your kettle for indirect heat. You can even use a beer can chicken rig and place it in the center. Cook at around 300-325°F, rotating occasionally, until the internal temperature in the thickest part of the thigh (without touching bone) reaches 165°F.
Vegetables: Beyond the Corn
Don’t forget the veggies! Grilling brings out their natural sweetness.
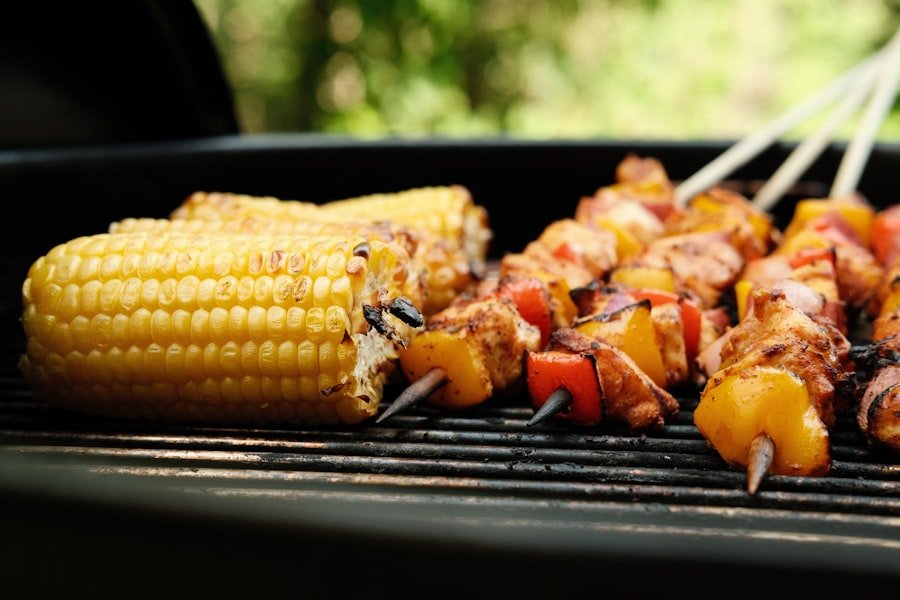
- Asparagus, Zucchini, Bell Peppers, Onions: Toss these with olive oil, salt, and pepper. Grill over direct or moderate direct heat. They cook quickly, so keep an eye on them.
- Corn on the Cob: You can grill corn in its husks (soaked in water first to prevent burning) or shucked. Grilling in the husk steams the corn while imparting a smoky flavor. Shucked corn will get a nice char.
Taking It Up a Notch: Smoke and Flavor
Once you’re comfortable with basic grilling, it’s time to explore the smoky side of the Weber Kettle.
Adding Wood for Smoke
This is where the “Weber Kettle BBQ” really comes alive.
- Wood Types:
- Hickory: Strong, classic BBQ flavor. Great for pork and beef.
- Mesquite: Intense, pungent flavor. Best used sparingly or for quick cooks.
- Oak: Milder than hickory, versatile for beef, pork, and lamb.
- Fruitwoods (Apple, Cherry): Sweet, mild smoke. Excellent for poultry and pork.
- Wood Chunks vs. Chips:
- Wood Chunks: Larger pieces that burn longer, providing sustained smoke for longer cooks. ideal for indirect grilling of large cuts.
- Wood Chips: Smaller pieces that burn faster, producing a more intense burst of smoke. Best for shorter cooks over direct or indirect heat.
- Using Wood: Soak wood chips for about 30 minutes before use (this is debated, some prefer dry for an immediate burst of smoke). For indirect cooking, place a few soaked chips or a couple of wood chunks directly on the hot coals. For direct grilling, you can add chips to the coals or place them in a foil packet with holes poked in it, heated directly on the grates, to create a smoke packet.
- When to Add Smoke: You want the initial burst of smoke. Once the wood stops producing visible smoke, it’s usually burned out. You may need to add more wood periodically for longer cooks.
Rubs and Marinades: Flavor Boosters
These are essential for adding depth and complexity to your grilled food.
- Dry Rubs: A mixture of spices and herbs applied to meat before cooking. They create a flavorful “bark” as they cook. Popular ingredients include paprika, brown sugar, garlic powder, onion powder, chili powder, black pepper, and salt.
- Marinades: Liquids (oil, vinegar, citrus juice, soy sauce, herbs, spices) that tenderize and flavor meat. Marinate for at least 30 minutes, and up to several hours, depending on the meat and marinade. Don’t marinate in a metal bowl, stick to glass or plastic. Always discard used marinade.
If you’re looking to enhance your outdoor cooking experience, you might want to explore the benefits of using a Weber kettle grill. This versatile grill is perfect for both beginners and seasoned grill masters, offering a unique combination of flavor and convenience. For more tips and tricks on maximizing your grilling skills, check out this informative article on grilling techniques that can help you make the most of your Weber kettle grill.
Troubleshooting Common Grilling Problems
| Feature | Specification |
|---|---|
| Grill Diameter | 22 inches |
| Material | Porcelain-enameled steel |
| Cooking Area | 363 square inches |
| Grates | Plated steel |
| Ash Catcher | Removable aluminum |
Even seasoned grillers run into hiccups. Here are some solutions.
Flare-Ups: The Enemy of Even Cooking
Flare-ups are caused by fat dripping onto the coals and igniting.
- Stop Them: Move food to the indirect side of the grill until the flames die down. Don’t blast it with water, as that can cool down your coals too much.
- Prevent Them: Trim excess fat from meats. Use a drip pan for fatty items. Ensure your grill grates are clean.
Food Sticking to the Grates
This is usually a sign of not enough heat, dirty grates, or not flipping the food at the right time.
- Fix It: Ensure your grates are hot and clean. Oil your grates just before placing food on them. Don’t try to force food off the grates; if it’s sticking, it’s probably not ready to flip. Give it another minute or two.
Temperature Too High or Too Low
This is where your vent control comes into play.
- Too High: Close the top vent partially or fully to let heat escape. You can also move food to the indirect side.
- Too Low: Open the bottom vent more to increase airflow to the coals. You might need to add more lit coals if it’s significantly low and you’ve been cooking for a while.
Uneven Cooking
This is generally due to an uneven charcoal bed or inconsistent heat distribution.
- Solution: Ensure your coals are spread evenly for direct cooking or concentrated in one area for indirect. Rotate your food periodically. If you notice one side of the grill is consistently hotter, learn to work with it and move food accordingly.
Mastering the Weber Kettle is a journey, not a destination. It’s about small victories, learning from each cook, and enjoying the process. Don’t be discouraged by initial challenges. With a little practice, some key tools, and an understanding of how heat works, you’ll be turning out incredible food that will have your friends and family begging for your secrets. Happy grilling!