Mastering the Art of Grilling with a Weber Charcoal Grill
So, you’ve got a Weber charcoal grill. Great choice! It’s a classic for a reason. People often wonder how to really unlock its potential beyond just slapping some burgers on. The good news is, mastering charcoal grilling isn’t some dark art; it’s about understanding a few key things and practicing. We’ll dive into how to get the best out of your Weber, from getting it lit just right to cooking incredible food every time. Think of it as building a solid foundation rather than chasing some elusive perfection.
Starting your charcoal grill can feel a bit intimidating at first, but it’s really about setting yourself up for success. The goal is to get your coals glowing hot and evenly distributed, not just smoky.
The Essentials: What You’ll Need
Before you even think about lighting, make sure you have the basics.
Lighter Fluid (Use Sparingly, if at all)
While lighter fluid is the most common method, it can impart a chemical taste if you’re not careful. If you do use it, a little goes a long way. Soak the coals, let it sit for a minute, and let the fluid really soak in. You want the coals to ignite from the fluid, not have the fluid burning off for ages.
Charcoal Chimney Starter: Your Best Friend
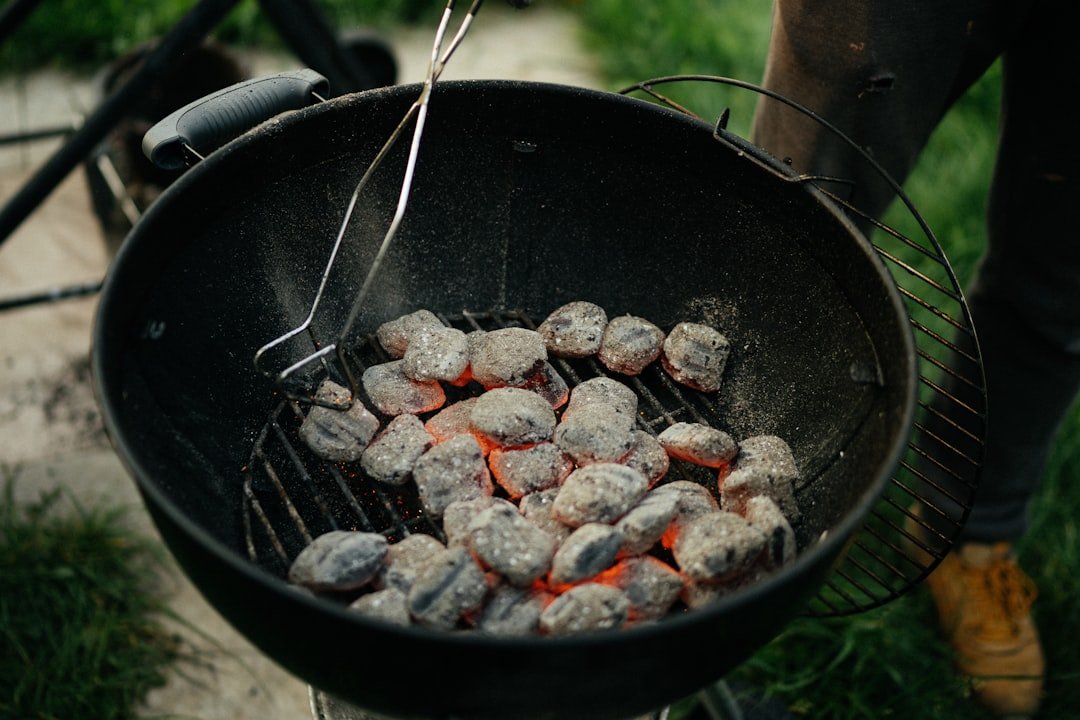
This is, hands down, the easiest and most effective way to get your coals ready. It’s basically a metal cylinder with a grate at the bottom and holes. You fill the bottom with crumpled newspaper or charcoal starter cubes, stuff your charcoal on top, light the newspaper from underneath, and in about 10-15 minutes, you’ll have perfectly lit coals ready to go. No lighter fluid taste, no guesswork.
Charcoal Type: Lump vs. Briquettes
Both have their pros and cons, and ultimately it comes down to preference.
Lump Charcoal
Lump charcoal is made from pure wood, charring it until it’s almost pure carbon. It burns hotter and cleaner than briquettes, meaning less ash and a more natural wood flavor. It also lights faster. The downside? It can be a bit more expensive and the pieces are irregular in size, which can make temperature control slightly trickier for beginners.
Briquettes
Briquettes are uniform in size and shape, typically made from charcoal fines, binders, and fillers. They offer a more consistent burn time and temperature, making them good for long cooks or when you need to maintain a specific heat. They do produce more ash than lump charcoal. Many people find them easier to manage for consistent results.
Lighting Your Charcoal: Step-by-Step
This is where the magic begins.
Using a Chimney Starter (Recommended Method)
- Crumple Newspaper: Take about two sheets of newspaper, crumple them loosely, and stuff them into the bottom chamber of your chimney starter. Alternatively, use a couple of charcoal starter cubes.
- Fill with Charcoal: Place your desired amount of charcoal (more for longer cooks, less for quick searing) on the grate at the top of the chimney.
- Light It Up: Hold a long match or lighter to the newspaper through the holes at the bottom of the chimney.
- Wait for the Glow: Give it about 10-15 minutes. You’ll know they’re ready when most of the coals have a gray ash coating and you can see glowing red embers within.
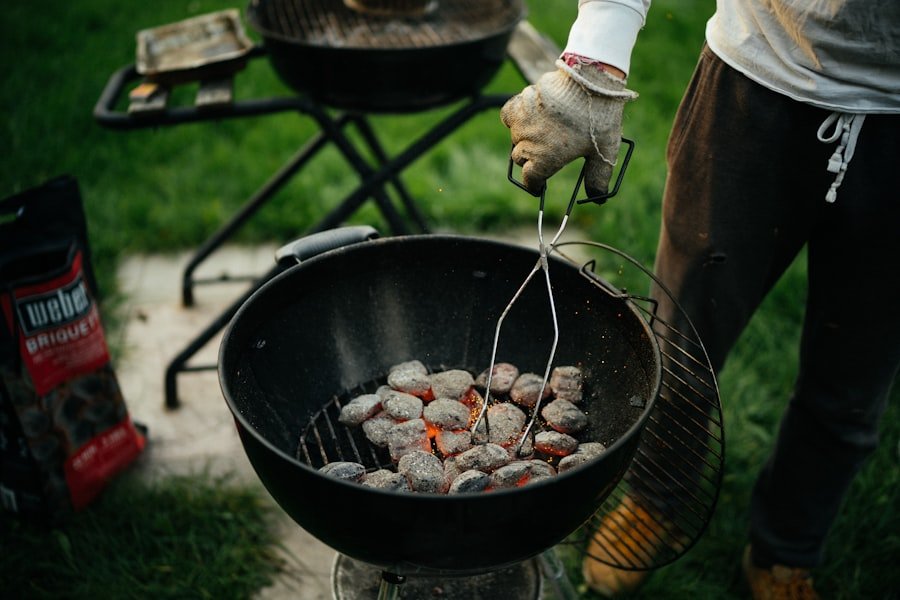
- Pour and Arrange: Carefully dump the hot coals into the grill.
Direct vs. Indirect Heat: The Foundation of Control
This is the big one. Understanding how to arrange your coals dictates what you can cook and how.
Direct Heat (For Searing and Quick Cooks)
Direct heat means the food is placed directly over the coals. This is ideal for thin cuts of meat like steaks, burgers, chicken breasts, and vegetables that cook quickly. It gives you that classic sear and char.
- How to Set Up: Spread the lit coals evenly across the bottom of the grill grate.
Indirect Heat (For Roasting and Slow Cooking)
Indirect heat is when the food is placed away from the coals, with the coals pushed to one side. This mimics an oven and is perfect for larger cuts of meat, whole chickens, ribs, or anything that needs to cook through without burning the outside.
- How to Set Up: Pile the lit coals to one side of the grill. Place your food on the opposite side. You can add a drip pan with some liquid (water, broth, beer) under the food on the side without coals to add moisture and catch drippings.
Two-Zone Grilling: The Best of Both Worlds
This is the ultimate technique for charcoal grilling. It’s a combination of direct and indirect heat. You have a hot side for searing and a cooler side for finishing or keeping food warm.
- How to Set Up: Arrange your coals in one of the configurations – either piling them to one side or placing them on opposite sides with a gap in the middle. You can then use the direct side to sear your steak, then move it to the indirect side to finish cooking to your desired temperature.
If you’re looking to enhance your grilling experience, you might find the article on the benefits of using a Weber charcoal grill particularly insightful. It explores various features that make Weber grills a favorite among barbecue enthusiasts, including their durability and superior heat retention. For more information, check out the article here: Weber Charcoal Grill Benefits.
Temperature Control: Keeping Your Grill Just Right
This is often what trips people up. Getting your grill to the right temperature and keeping it there is crucial for consistent results.
Understanding Grill Temperatures
Grilling temperatures are generally categorized as follows:
- Low Heat (200-275°F / 90-135°C): Ideal for slow smoking, cooking large roasts, and anything that needs to cook for a very long time.
- Medium Heat (300-375°F / 150-190°C): The versatile middle ground. Good for larger poultry, thicker cuts of steak, and most dishes that benefit from a moderate cooking time.
- High Heat (400-500°F+ / 200-260°C+): Perfect for searing steaks, burgers, chicken wings, and vegetables that you want to char quickly.
How to Manage Grill Temperature
It’s a bit of a dance with your vents and coals.
The Role of the Vents
Your Weber grill has vents on the lid and often on the bottom. These are your primary tools for controlling airflow, which directly impacts temperature.
Bottom Vents (Air Intake)
These control how much oxygen gets to the coals.
- Opening Wider = More Oxygen = Hotter Fire: Think of it like fanning a campfire.
- Closing Down = Less Oxygen = Cooler Fire: This starves the coals.
Top Lid Vent (Exhaust)
This controls how much heat and smoke escapes.
- Opening Wider = More Exhaust = Cooler (but can draw air through coals if adjusted poorly): Lets heat and smoke escape.
- Closing Down = Less Exhaust = Traps Heat = Hotter: You want to keep the heat in for cooking.
Pro Tip: A common mistake is to fiddle with the bottom vents when the lid vent should be the primary adjustment for steady heat. For sustained cooking, adjust the bottom vents to control the burn rate of the coals, and then use the lid vent to control the overall grill temperature.
Adjusting Coals for Temperature
Sometimes, you just need to physically move coals.
Adding More Coals
If your fire is dying out and you need more heat, you’ll need to add more lit coals. Light them in a chimney starter first – adding unlit coals will just cool everything down and create smoke.
Spreading Coals Out
To lower the temperature, spread your coals out more thinly across the grill. This creates more surface area for them to cool down and reduces the direct heat hitting your food.
Creating Hot and Cool Spots
As mentioned in the two-zone setup, this is key. If food is cooking too fast, move it to the cooler side. If you need more sear, move it to the hottest part.
Using a Thermometer: Your Grilling Compass
While you can get a feel for grill temperatures, a good reliable thermometer is indispensable, especially for anything beyond basic burgers.
Grill Thermometer
Most Weber kettles have a built-in thermometer on the lid, but these can be notoriously inaccurate as they measure the temperature at the lid, not at grate level where your food is.
Instant-Read Thermometer
This is a portable, handheld device that you stick into the thickest part of your food to get an accurate internal temperature. It’s essential for knowing when chicken is safely cooked, when steak is at your desired doneness, or when pork shoulder is tender enough to shred.
Probe Thermometer (Leave-In)
These are fantastic for longer cooks. A probe is inserted into the meat, and a cable runs to a base unit that sits outside the grill. This constantly monitors the internal temperature of your food without you having to open the lid.
Grilling Techniques: Beyond the Basics
Once you’ve got the fire going and temperature under control, it’s time to talk about how to actually cook your food.
Searing: That Perfect Crust
Searing is crucial for flavor and texture. It’s that delicious brown crust you get on steak or burgers.
The Importance of a Hot Grill
For a good sear, you need a screaming hot grill. This means direct heat and fully lit coals.
Don’t Crowd the Grill
Give your food space. If you cram too much onto the grill, the temperature will drop significantly, and you’ll end up steaming your food instead of searing it.
The Flip: Less is More
For steaks and burgers, resist the urge to flip constantly. Let one side develop a good crust before flipping. One or two flips is usually enough.
Smoking: Low and Slow on a Weber
You might think you need a dedicated smoker for great barbecue, but your Weber charcoal grill is perfectly capable of smoking.
Setting Up for Smoking (Indirect Heat)
- Arrange Coals: Pile your lit coals to one side of the grill.
- Add Wood Chunks or Chips: Soak wood chunks or chips (hickory, mesquite, apple, cherry are popular choices) in water for at least 30 minutes. Drain them and scatter them over the hot coals.
- Use a Drip Pan: Place a foil drip pan filled with water, apple juice, or broth on the side of the grill without coals, directly under where your food will be. This adds moisture and helps create steam, which is essential for tender smoked meats.
- Control Temperature: Aim for that low-and-slow temperature range (200-275°F / 90-135°C). Use your vents to maintain this.
Wood Selection: Flavor Profiles
- Hickory: Strong, classic barbecue flavor. Great for pork and beef.
- Mesquite: Intense, smoky flavor. Best for quick-cooking items like steaks and burgers, or used sparingly with larger cuts.
- Fruitwoods (Apple, Cherry): Milder, sweeter smoke. Excellent for poultry and pork.
Monitoring Smoke
You want a thin, blueish smoke – this is good smoke that imparts flavor. Thick white smoke is often a sign of incomplete combustion and can taste bitter. If you’re getting too much white smoke, your vents might be too closed, or you’ve added too much unlit fuel.
Roasting on the Grill
Roasting on a charcoal grill is essentially like using your oven, but with a delicious smoky flavor.
Indirect Heat is Key
Similar to smoking, you’ll want to set up for indirect heat.
Larger Cuts and Whole Chickens
This method is perfect for whole chickens, turkeys, pork roasts, and large cuts of beef.
Maintaining Consistent Temperature
Monitor your grill temperature closely and adjust vents as needed. It’s a good idea to use a leave-in probe thermometer to track the internal temperature of the meat.
Direct Grilling vs. Other Methods
Don’t be afraid to play around.
Grilling Vegetables
Vegetables grill beautifully! Thicker vegetables like asparagus, corn on the cob, bell peppers, and zucchini can be grilled directly. You can also grill them in foil packets for a simpler approach.
Grilling Seafood
Delicate fish and shrimp cook very quickly. You’ll typically want high, direct heat for a short time. For flakier fish, a fish basket or grilling plank can prevent it from falling apart.
Essential Weber Grill Accessories
While you can grill with just the basics, a few accessories can make your life easier and improve your results.
The Grill Brush: Keeping it Clean
This might seem obvious, but a good grill brush is non-negotiable.
Why Cleaning Matters
A clean grill grate prevents food from sticking, reduces flare-ups, and ensures better heat distribution. Plus, it’s just more pleasant to cook on.
Wire vs. Bristle-Free
Many Weber grills come with wire brushes. While effective, there’s a risk of bristles breaking off and getting into your food. Consider bristle-free alternatives like nylon brushes or scraper-style brushes for added safety.
The Lid Handle Tool
Many Weber grills have a hinged lid. A tool to open the lid without burning yourself is a simple but useful addition.
Charcoal Rake/Grill Tool
A long-handled rake can be helpful for spreading hot coals around, especially when setting up for indirect cooking or when you need to adjust the fire mid-cook.
Grill Gloves
For safety and comfort, a good pair of heat-resistant grill gloves is a wise investment. They protect your hands from heat when handling tools or adjusting the grill.
Aluminum Foil and Drip Pans
As mentioned, foil is incredibly versatile. It can be used for creating packets, lining drip pans, or even wrapping meats to stop them from drying out or to speed up cooking (the “Texas Crutch” for brisket). Drip pans are essential for catching grease and adding moisture during indirect cooking.
If you’re looking to elevate your outdoor cooking experience, a Weber charcoal grill is a fantastic choice that combines quality and performance. To enhance your grilling skills, you might find it helpful to explore a related article on the best grilling techniques. This resource offers valuable insights that can help you make the most of your Weber grill. For more information, check out the article here.
Troubleshooting Common Grilling Problems
| Feature | Specification |
|---|---|
| Brand | Weber |
| Grill Type | Charcoal |
| Material | Steel |
| Cooking Area | 363 square inches |
| Dimensions | 22.5 x 25 x 38.5 inches |
| Weight | 32.3 pounds |
Even experienced grillers run into issues. Here are a few common ones and how to fix them.
Flare-Ups: The Fiery Menace
Flare-ups happen when grease drips onto the coals and ignites.
Causes
- Too much fat on your food.
- Overcrowding the grill.
- Too much grease buildup on the grill grates.
Solutions
- Move Food: If a flare-up is threatening your food, simply move it to a cooler part of the grill (indirect heat).
- Direct the Heat: With a two-zone setup, move the food to the indirect side.
- Close the Lid Briefly (with caution): Closing the lid can sometimes starve the fire of oxygen and reduce flare-ups, but be mindful that this can also increase the grill temperature temporarily.
- Scrape the Grates: Clean your grates regularly to minimize grease.
Food Sticking to the Grill
This is frustrating and ruins that beautiful sear.
Causes
- Grill not hot enough.
- Grill grates are dirty.
- Food is not ready to be flipped.
Solutions
- Preheat Properly: Ensure your grill is good and hot before placing food on it.
- Clean Your Grates: A vigorous scrub before and during cooking helps.
- Don’t Rush the Flip: Let your food develop a crust. Usually, it will release easily when it’s ready. If it’s sticking, give it another minute.
Uneven Cooking
One side is done, the other isn’t.
Causes
- Uneven coal distribution.
- Uneven heat from the coals.
- Wind.
Solutions
- Manage Your Coal Bed: Always aim for an even spread of coals for direct heat, or a clear separation for indirect.
- Rotate Food: Turn your food occasionally to ensure even cooking, especially if you notice one side cooking faster.
- Consider Wind Direction: Position your grill to minimize the effect of strong winds.
Burnt Outside, Raw Inside
This is a classic problem with high, direct heat.
Causes
- Grill is too hot for the thickness of the food.
- Not enough time on indirect heat.
Solutions
- Master Two-Zone Grilling: Sear on direct heat, then move to indirect heat to finish cooking. This is the most effective solution.
- Lower Grill Temperature: If cooking solely on direct heat, ensure your grill is not excessively hot for thinner cuts.
- Use a Thermometer: Don’t guess. Check the internal temperature to know when it’s truly done.
Mastering your Weber charcoal grill is a journey, not a destination. It’s about experimenting, learning from each cook, and enjoying the process. Don’t be discouraged if a few things don’t go perfectly at first. Each time you fire up that grill, you’re building experience and getting closer to grilling greatness. Happy grilling!